Solana has come a long way. Back in the early days, it was known for two things: crazy speed and dirt-cheap fees.
In 2025, not much has changed. Except for the fact that Solana’s ecosystem is now way bigger.
Solana isn’t a niche chain anymore. It’s one of the fastest-growing networks, regularly handling thousands of transactions per second with near-zero fees.
Because of this growth, more users want to move their assets into the Solana ecosystem from Ethereum, BNB Chain, Polygon, Tron, Bitcoin, and others.
That’s where bridges come in.
Bridges let you take your tokens, like ETH, USDT, or BTC, from another chain and bring them safely onto Solana. They’re the glue that connects multiple ecosystems.
In this guide, I’ll show you the best Solana bridges in 2025. I’ll explain exactly how to use them, and what their pros and cons are.
Let’s dive in!
Key highlights:
- Allbridge Core – A Solana-native bridge ideal for stablecoins like USDC/USDT, with optional yield during transfers.
- Axelar + Squid Router – This lets you swap and bridge in one step, powered by Axelar’s cross-chain messaging network.
- Wormhole (Portal) – The most widely used Solana bridge, connecting 30+ chains including Ethereum, BNB, and Tron.
- Jupiter Aggregator – Solana’s top DEX aggregator that also finds the best bridging routes automatically.
- Synapse Protocol – A fast, low-fee bridge supporting native token swaps and transfers across Solana and 20+ other chains.
- deBridge – A high-security, decentralized bridge supporting tokens, NFTs, and even cross-chain limit orders.
How Solana bridges work (and why they matter)
Let’s say you have some ETH on Ethereum. You want to use that ETH on Solana.
But there’s a problem: Ethereum and Solana are completely separate blockchains. They don’t speak the same language.
That’s where bridges come in.
Lock-and-mint: The standard method
Most bridges use a process called lock-and-mint.
Here’s how it works:
- You send your ETH to a smart contract on Ethereum.
- That ETH gets locked inside the contract.
- At the same time, the bridge mints a wrapped version of ETH on Solana.
- You now hold “wrapped ETH” on Solana (usually called something like ETH (Wormhole)).
It’s the same value as the original ETH. You just moved it to another chain. And the original ETH is still safely locked on Ethereum, waiting for you if you ever want to move it back.
When you’re done, you can burn the wrapped ETH on Solana, and the original ETH gets unlocked on Ethereum. That part is called burn-and-release.
All of this happens through smart contracts, not middlemen. So you don’t need to trust a person or a company to hold your funds. The whole process is automated and secure (assuming the bridge is well-audited).
Liquidity pools: A faster alternative
Some bridges skip the locking and minting part. Instead, they use liquidity pools.
Here’s how that works:
- You send USDC on Ethereum.
- The bridge doesn’t mint anything. It just gives you USDC on Solana from its own pool.
- On the backend, someone else has already deposited USDC into the Solana pool to make that possible.
Think of it like swapping money at a currency exchange booth. You give them euros, and they hand you dollars.
This model is faster and often cheaper, but it depends on how much liquidity is available. Platforms like Celer and Symbiosis use this approach.
Both methods work. Some bridges even offer both.
Best Solana bridges in 2025
With Solana continuing to grow as one of the fastest and most cost-efficient blockchains, the demand for secure and seamless bridging solutions is higher than ever. While there are many cross-chain protocols on the market, the following Solana bridges stand out in 2025 for their reliability, low fees, and user-friendly design.
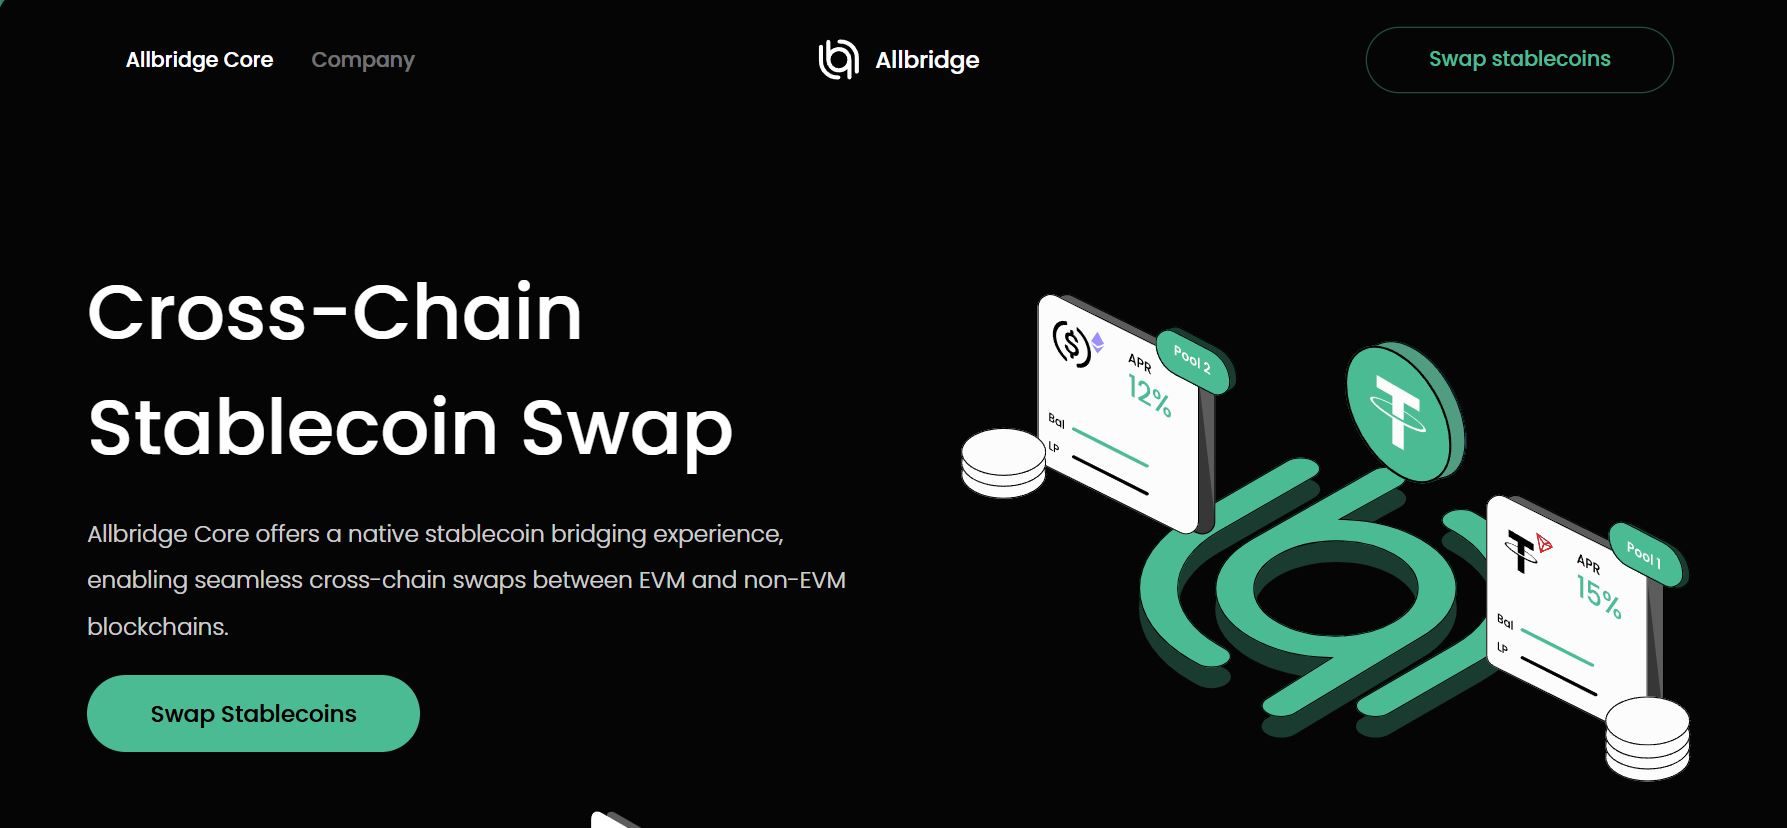
1. Allbridge Core – A stablecoin-focused bridge to Solana with passive yield options
If you’re working with stablecoins, Allbridge might be your new favorite tool.
Allbridge is a native Solana bridge that launched in 2021. It now supports over 20 blockchains, including Ethereum, Arbitrum, Polygon, and Tron.
It’s especially useful if you’re moving to USDT or USDC, and here’s why:
Yield while you bridge? Yep.
Allbridge Core lets your stablecoins earn interest while they’re being transferred.
So instead of your USDC just sitting idle in transit, it actually collects yield before landing on Solana. It’s not that different from crypto staking.
That’s a unique feature in the bridge space, and it’s one reason Allbridge has grown so quickly.
Tron support + more
Most bridges ignore Tron, but not Allbridge.
You can bridge TRC-20 USDT directly from Tron to Solana. That’s a big deal since many people buy and store USDT on Tron, Tron still holds a huge share of the global USDT supply.
On top of that, Allbridge supports transfers from other non-EVM chains like NEAR through its classic bridge module.
DeFi traders and liquidity providers often choose Allbridge because:
- The UI is clean and beginner-friendly
- It supports large volumes with low slippage
- Transfers are fast and reliable
- It crossed $100 million TVL by early 2024
If you’re looking to move stablecoins into Solana DeFi, Allbridge Core is one of the best tools in 2025.
How to bridge stablecoins using Allbridge
It’s very easy. The process is virtually the same as for the Wormhole. Let’s assume you want to transfer USDT from Tron to Solana.
- Go to Allbridge Core: Visit allbridge.io.
- Connect your wallets: Connect your source wallet (like MetaMask for Ethereum or TronLink for Tron). Also connect your Solana wallet (Phantom or Solflare) for receiving tokens.
- Select chains: Choose Tron as the source. Set Solana as the destination.
- Pick your asset: Choose USDT. Type in the amount you wish to bridge.

- Bridge & approve: Click Transfer. Confirm the transaction in your source wallet (and pay the gas fee).
- Claim on Solana: After a few minutes, your stablecoin will appear in your Solana wallet—no extra steps required.
2. Axelar Network – A smart Solana bridge for cross-chain swaps and contract calls
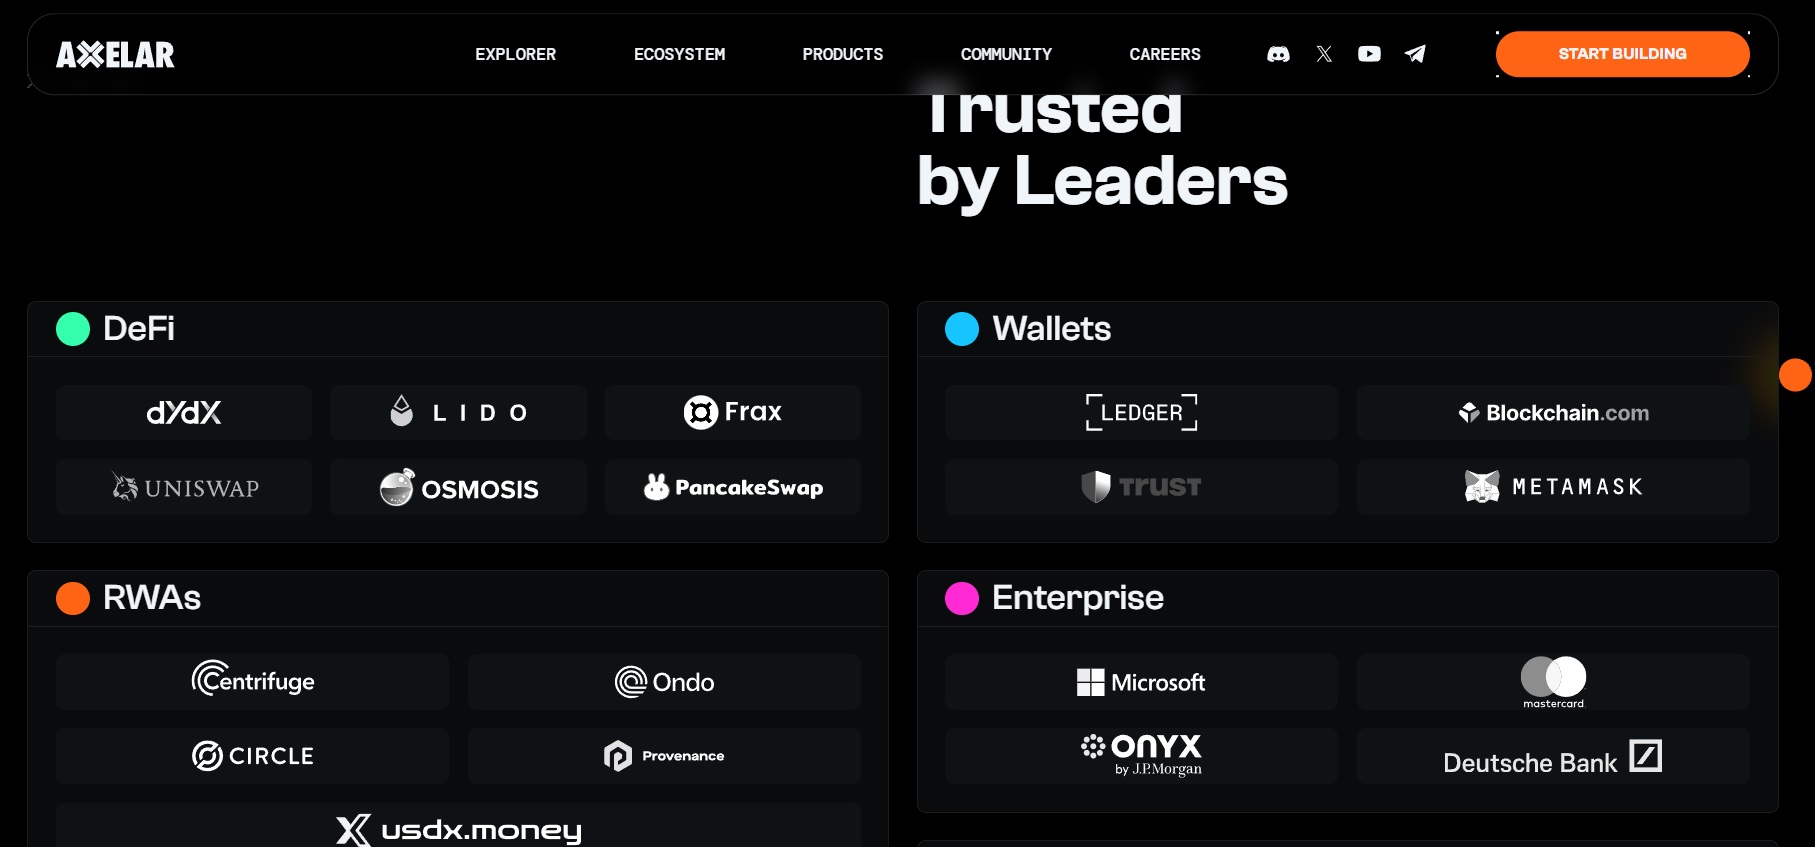
Axelar is an entire cross-chain infrastructure layer (and a bridge).
It connects over 50 different blockchains, including Ethereum, Avalanche, Cosmos, and yes, Solana.
But instead of simply moving tokens, Axelar goes a step further: it lets different blockchains talk to each other.
So a smart contract on Solana could trigger something on Ethereum. Or a Cosmos app could send data into Solana.
How Axelar works
Most bridges use lock-and-mint. Axelar doesn’t.
Instead, it uses gateway smart contracts on each chain, combined with a decentralized validator network. This validator set confirms every transfer across chains, which makes the process trustless and secure.
You’re not depending on one centralized system. The transfer only happens if the entire validator set agrees it’s legit.
One-step swaps with Squid Router
If you’re a user (not a dev), here’s what matters:
Axelar powers the Squid Router. This is a tool that lets you swap and bridge in one step. So instead of:
- swapping ETH to USDC
- bridging USDC to Solana
- then swapping to SOL
You just do it all in one click. Squid handles the routing behind the scenes.
It’s fast. It saves gas. And it’s beginner-friendly.
How to bridge tokens to Solana using Axelar (via Squid Router)
Let’s say you have USDC on Arbitrum and you want to use it on Solana.
Here’s how to do it using Squid Router, powered by Axelar:
- Step 1: Go to Squid Router.
- Step 2: Connect your MetaMask wallet for Arbitrum. Then connect your Solana wallet (like Phantom).
- Step 3: In the “Pay” section, select Arbitrum and choose USDC as the token.
- Step 4: In the “Receive” section, choose Solana and pick your target token (e.g. SOL or USDC).
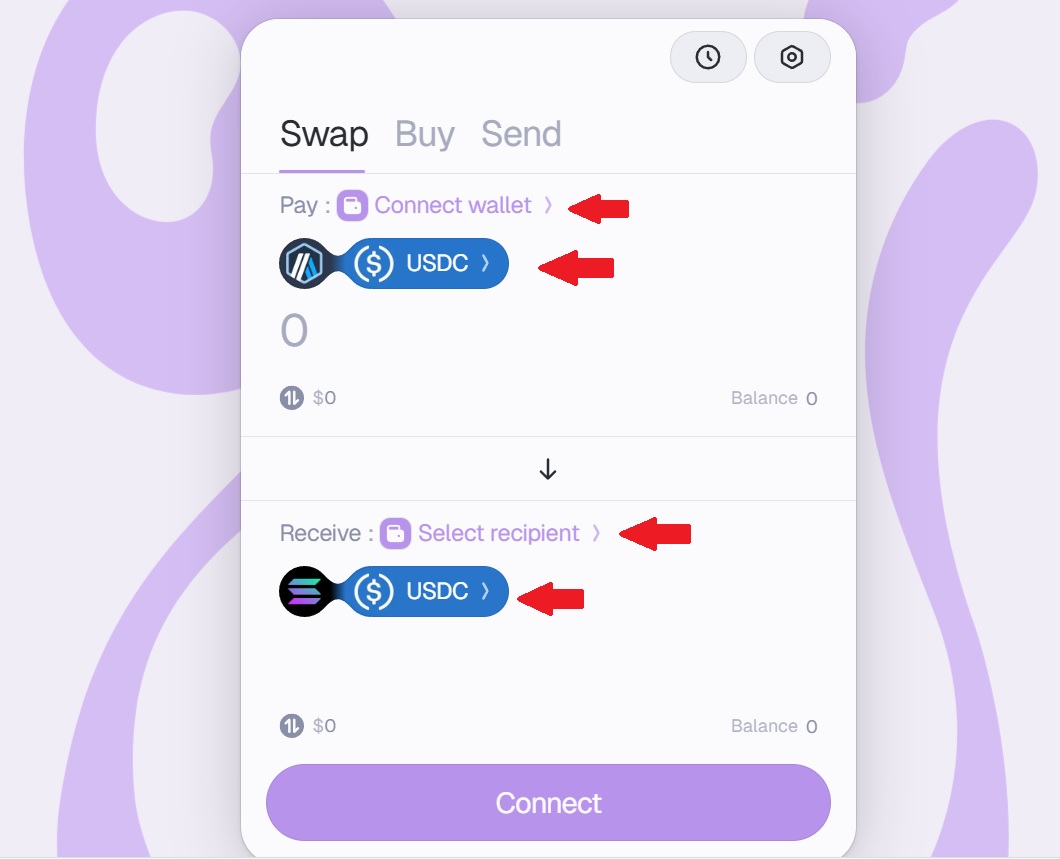
- Step 5: Click Swap. Approve the transaction in MetaMask.
- Step 6: Wait for the bridging and swap to complete (usually a few minutes).
- Step 7: Your token will arrive directly in your Solana wallet.
By the way, you can also bridge tokens to Arbitrum from Ethereum (or another chain).
3. Wormhole (Portal Bridge) – the most popular Solana bridge for multi-chain transfers
If you’re looking for the most popular way to bridge to Solana, Wormhole is it.
Wormhole is backed by Jump Crypto and connects Solana with over 30 different blockchains. That includes big names like Ethereum, BNB Chain, Polygon, Avalanche, and Arbitrum. Plus non-EVM chains like Tron and Bitcoin.
It’s one of the best crypto bridges for cross-chain overall.
You can bridge not just tokens, but even NFTs, which makes Wormhole one of the most versatile options on the market.
Why people trust Wormhole in 2025
Wormhole had a rough patch back in 2022 when it was exploited for $300M. But since then, it’s recovered strongly.
They’ve:
- Rebuilt the core security framework
- Brought in top-tier audits
- Added more validators and guardian nodes
In 2025, it’s considered one of the safest and most reliable bridges in the Solana ecosystem. It’s also integrated into major wallets and dApps.
If you’re using Phantom, Backpack, or a DEX on Solana, there’s a good chance Wormhole is running in the background.
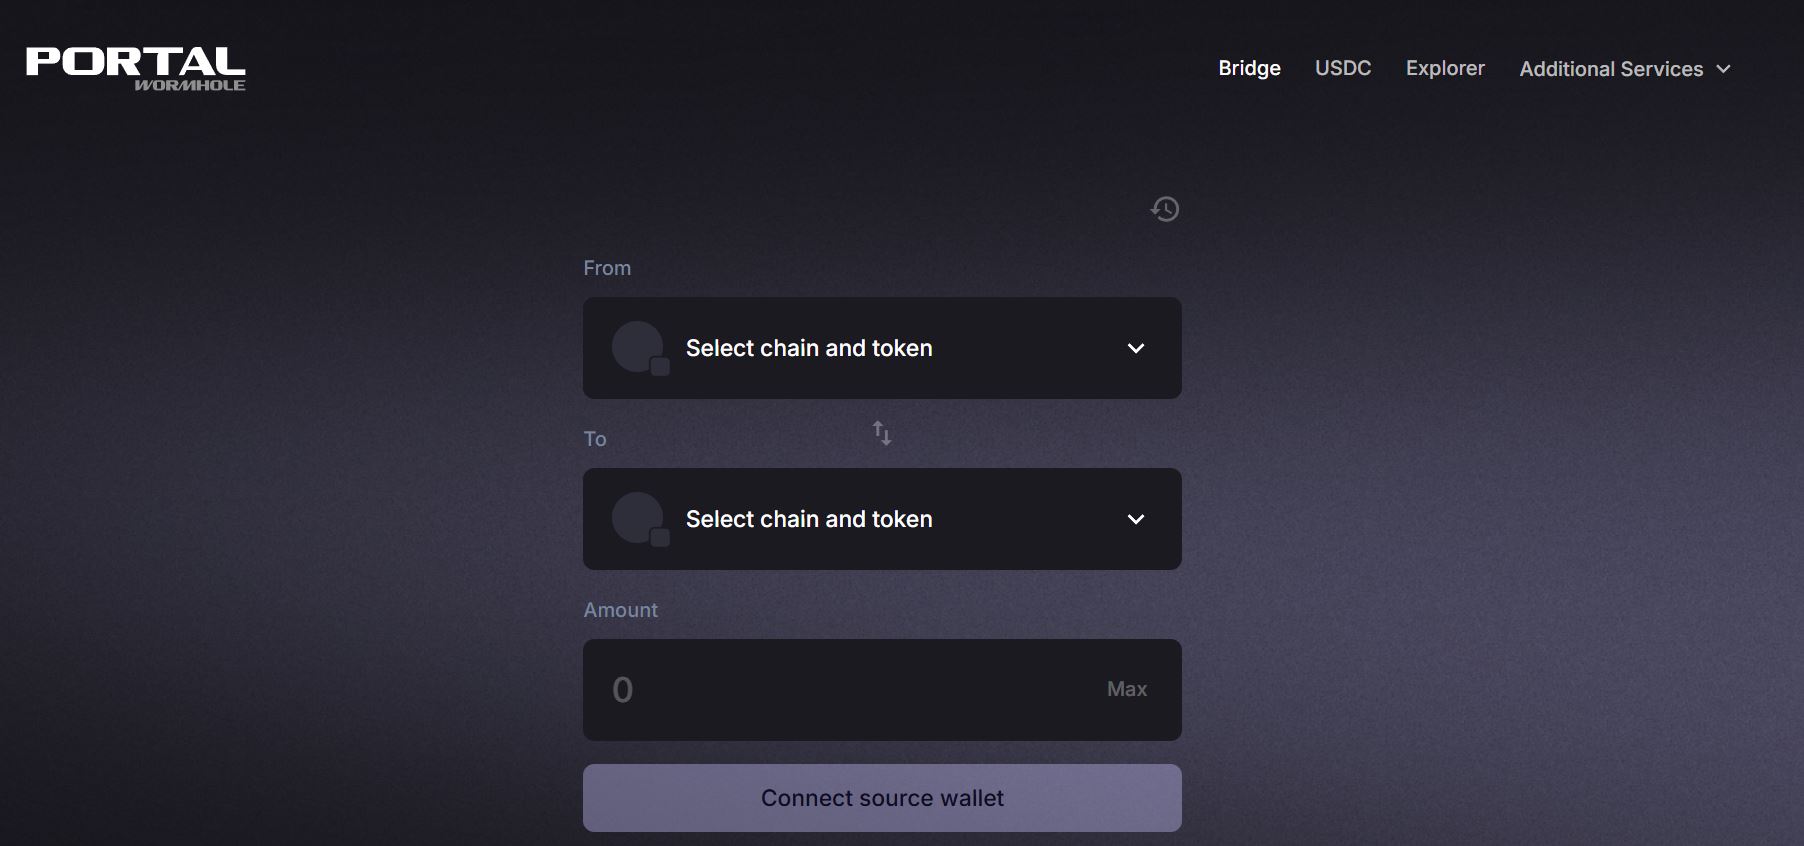
How to bridge USDC from Ethereum to Solana using Wormhole
Let’s walk through a simple example.
Let’s say you have USDC on Ethereum, and you want to move it to Solana.
Here’s how to do it with Wormhole (via Portal Bridge):
- Step 1: Go to the official Portal Bridge: https://portalbridge.com
- Step 2: Connect your MetaMask wallet to Ethereum. Then connect your Phantom wallet for Solana.
- Step 3: Choose Ethereum as the source chain and Solana as the destination. Select USDC as the token for both.
- Step 4: Enter the amount you want to bridge. Make sure to leave some ETH in your wallet to cover gas.
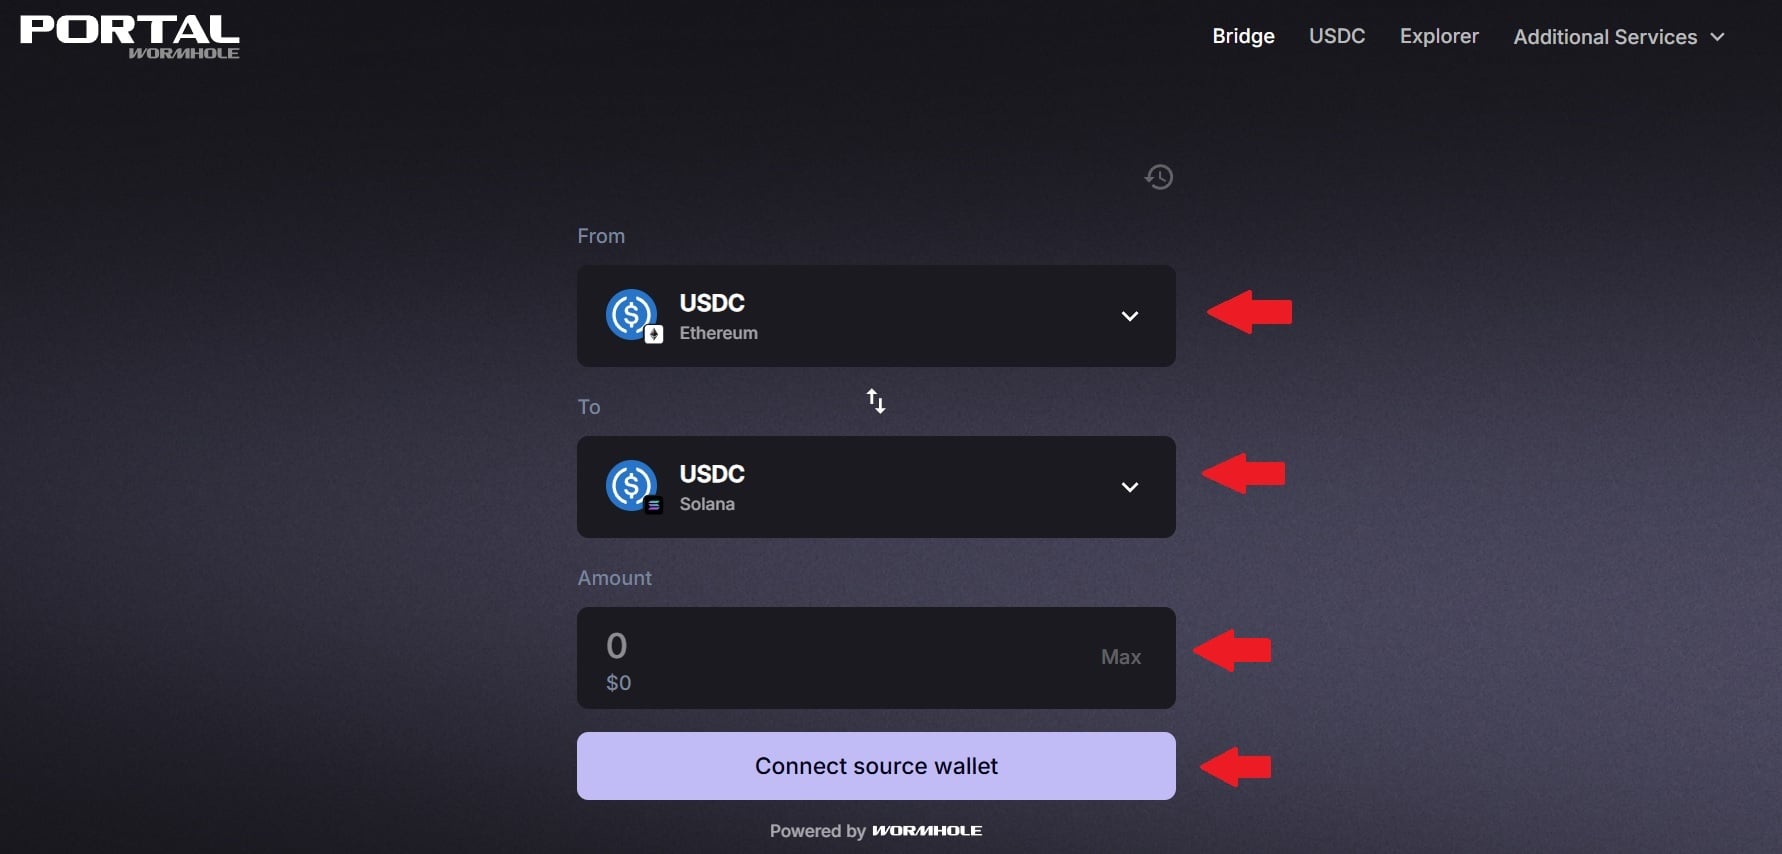
- Step 5: Click “Next” and approve the transaction in MetaMask. This will lock your USDC on Ethereum.
- Step 6: Wait a few minutes. Once the transaction is confirmed, you’ll see an option to redeem the tokens on Solana.
- Step 7: Confirm the redemption in Phantom. The wrapped USDC will appear in your wallet.
Done. You’ve just bridged USDC to Solana using Wormhole.
4. Jupiter aggregator – Best for hands-off bridging inside swap interfaces
Okay, this one’s not technically a bridge. But in 2025, it’s how a lot of people bridge to Solana without even realizing it.
Jupiter is Solana’s leading swap aggregator. It finds you the best price and path when swapping tokens across Solana-based DEXs.
But now, it also aggregates bridges.
So if you want to bridge to Solana from another chain, Jupiter can automatically:
- Swap your token (on Ethereum, for example) into a bridgeable asset like USDC
- Use a bridge like Wormhole to move it to Solana
- Then swap it into your target token (like SOL or BONK) on arrival
All in one interface. Minimal steps. Max efficiency.
It’s even built into many Solana wallets like Phantom, which means users often bridge without realizing it.
If you’re new to bridging, or just want the easiest route, Jupiter is a great place to start.
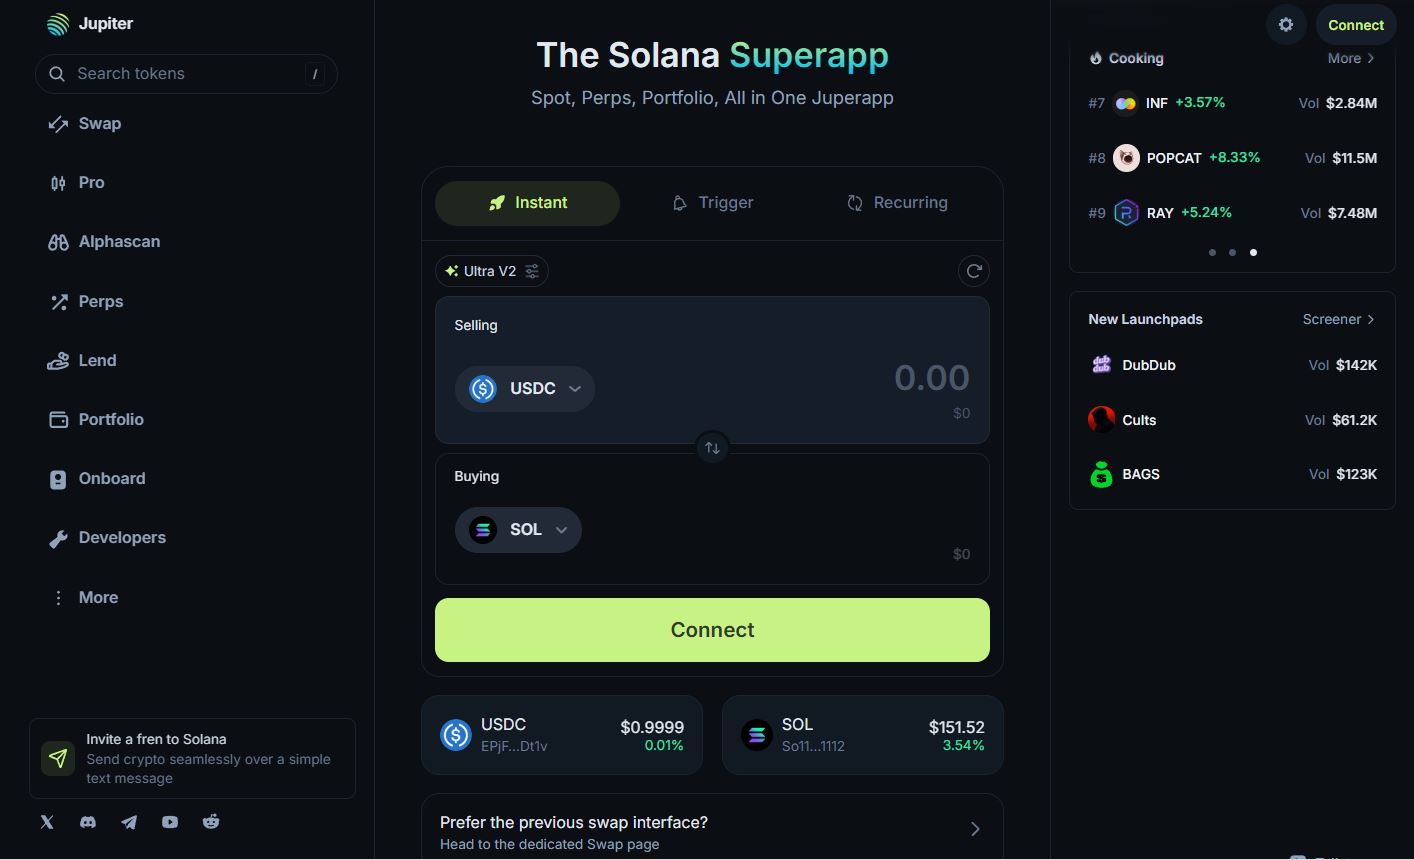
How to bridge Solana using Jupiter
Let’s say you have DAI on Ethereum and you want to end up with SOL on Solana.
Here’s how to do it with Jupiter:
- Step 1: Go to Jupiter.
- Step 2: Click “Connect Wallet.” Connect your MetaMask (for Ethereum) and your Solana wallet (like Phantom).
- Step 3: Choose DAI on Ethereum as the input token. Choose SOL on Solana as the output token.
- Step 4: Jupiter will automatically suggest the best route. It will likely use Wormhole or another bridge in the background.
- Step 5: Click Swap, then approve the transaction in MetaMask.
- Step 6: Wait for bridging + swapping to complete. It usually takes a few minutes.
- Step 7: Your SOL will show up in your Solana wallet automatically.
No bridge interface. No manual steps. Jupiter handles it all.
5. Synapse Protocol – Best for fast, low-fee token transfers to and from Solana
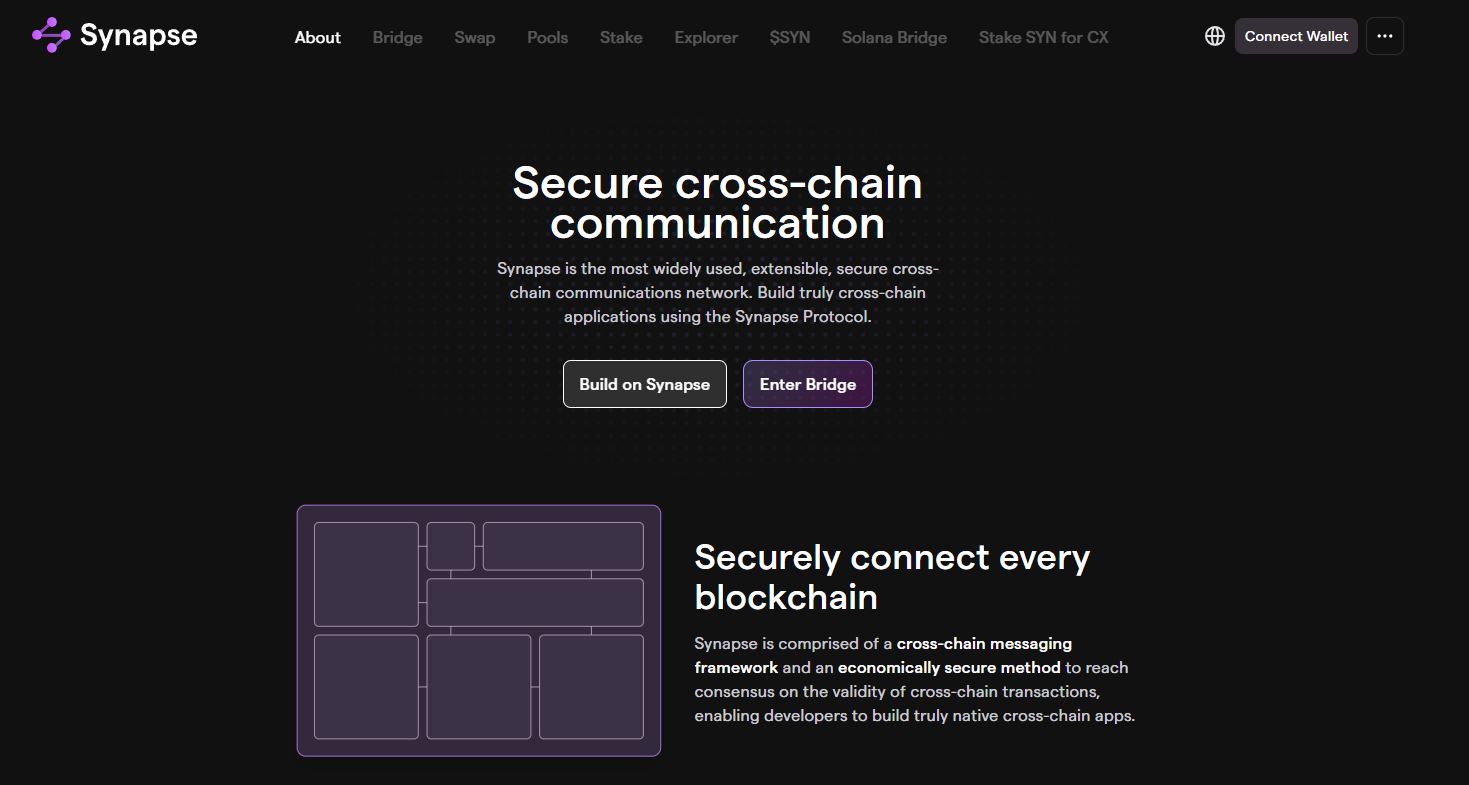
Synapse Protocol is a major cross-chain bridge and swap network.
It works much like the others. It offers both lock-and-mint and liquidity-based bridging options for asset transfers across chains.
Synapse supports over 20 networks, including Ethereum, BSC, Polygon, Avalanche, and Solana. It also integrates with Arbitrum, Optimism, Fantom, and more.
Why use Synapse in 2025?
- Broad chain support: from EVM chains to Solana.
- Hybrid mechanism: uses both liquidity pools (for fast swaps) and bridging (for secure transfers).
- Cross-chain swaps: you can swap while bridging, so there are fewer manual steps.
- Decentralized and audited: governed by a DAO and regularly security-audited.
- Competitive rates and slippage: great for stablecoins and mid-sized token transfers.
How to bridge tokens to Solana using Synapse Protocol
Let’s say you have USDC on Base and want to move it to Solana:
- Step 1: Visit solana.synapseprotocol.
- Step 2: Connect your source, EVM wallet (e.g. TrustWallet or MetaMask) and your Solana wallet (Phantom or Solflare).
- Step 3: Select Base as the source chain and Solana as the destination.
- Step 4: Choose USDC as your token and enter the amount.
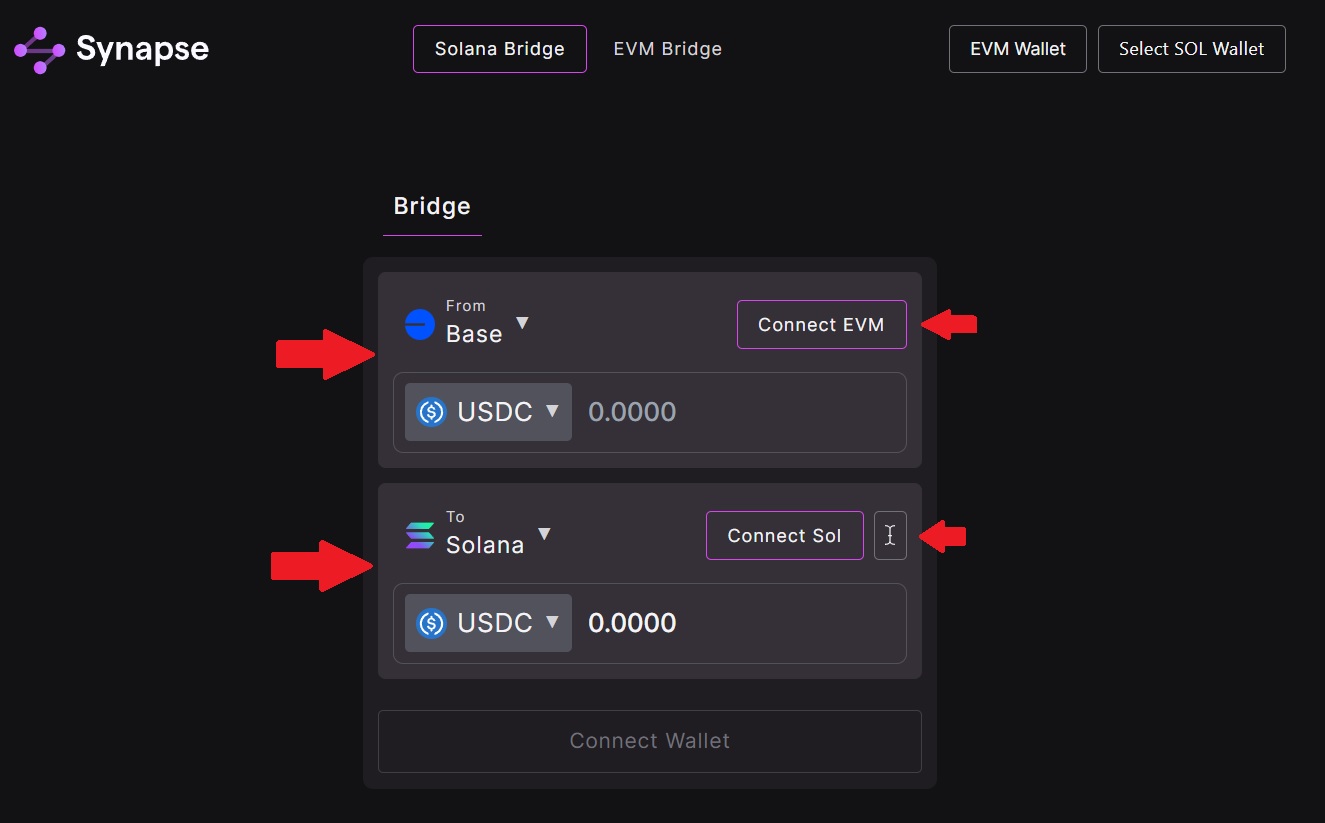
- Step 5: Click Transfer, approve the transaction in MetaMask, and pay the necessary gas fee.
- Step 6: Depending on liquidity, Synapse will route your USDC via pools or via the lock-and-mint bridge.
- Step 7: After a few minutes, your USDC or wrapped USDC will arrive in your Solana wallet without needing additional steps.
Of course, you could do the reverse as well, and use Synapse as a Solana to Base bridge.
6. deBridge – A high-security bridge to Solana for NFTs and institutional volume
If you care about security and flexibility, deBridge is worth checking out.
It’s a cross-chain messaging and asset transfer protocol that connects Solana, Ethereum, and other major chains. It’s built for power users and institutions.
Designed with security first
deBridge uses a multi-validator model. That means multiple independent nodes must agree before any transfer is approved. This prevents spoofing, exploits, or any single point of failure.
Back in 2022, they even blocked a phishing-based exploit before any damage could be done. That kind of proactivity is rare in the bridging world.
What makes deBridge unique?
- You can bridge any asset, including tokens and NFTs
- It supports cross-chain limit orders, like a built-in DEX that works across chains
- It’s optimized for high-volume transfers, so institutional DeFi teams use it often
If you’re just bridging $50 worth of tokens, this might be overkill. But if you’re managing bigger transfers (or want advanced features) deBridge delivers.
How to bridge ETH to Solana using deBridge
If you want to learn how to bridge ETH to Solana from Ethereum, here’s how to do it with deBridge:
- Step 1: Go to deBridge Finance’s Bridge.
- Step 2: Connect your MetaMask wallet to Ethereum. Then connect your Solana wallet.
- Step 3: Select Ethereum as the source chain and Solana as the destination.
- Step 4: Choose the token you want to send (e.g. ETH, USDC, or even an NFT). Then choose the recipient token. In the example below, I chose to send ETH from the Ethereum network and receive USDT on the Solana network.
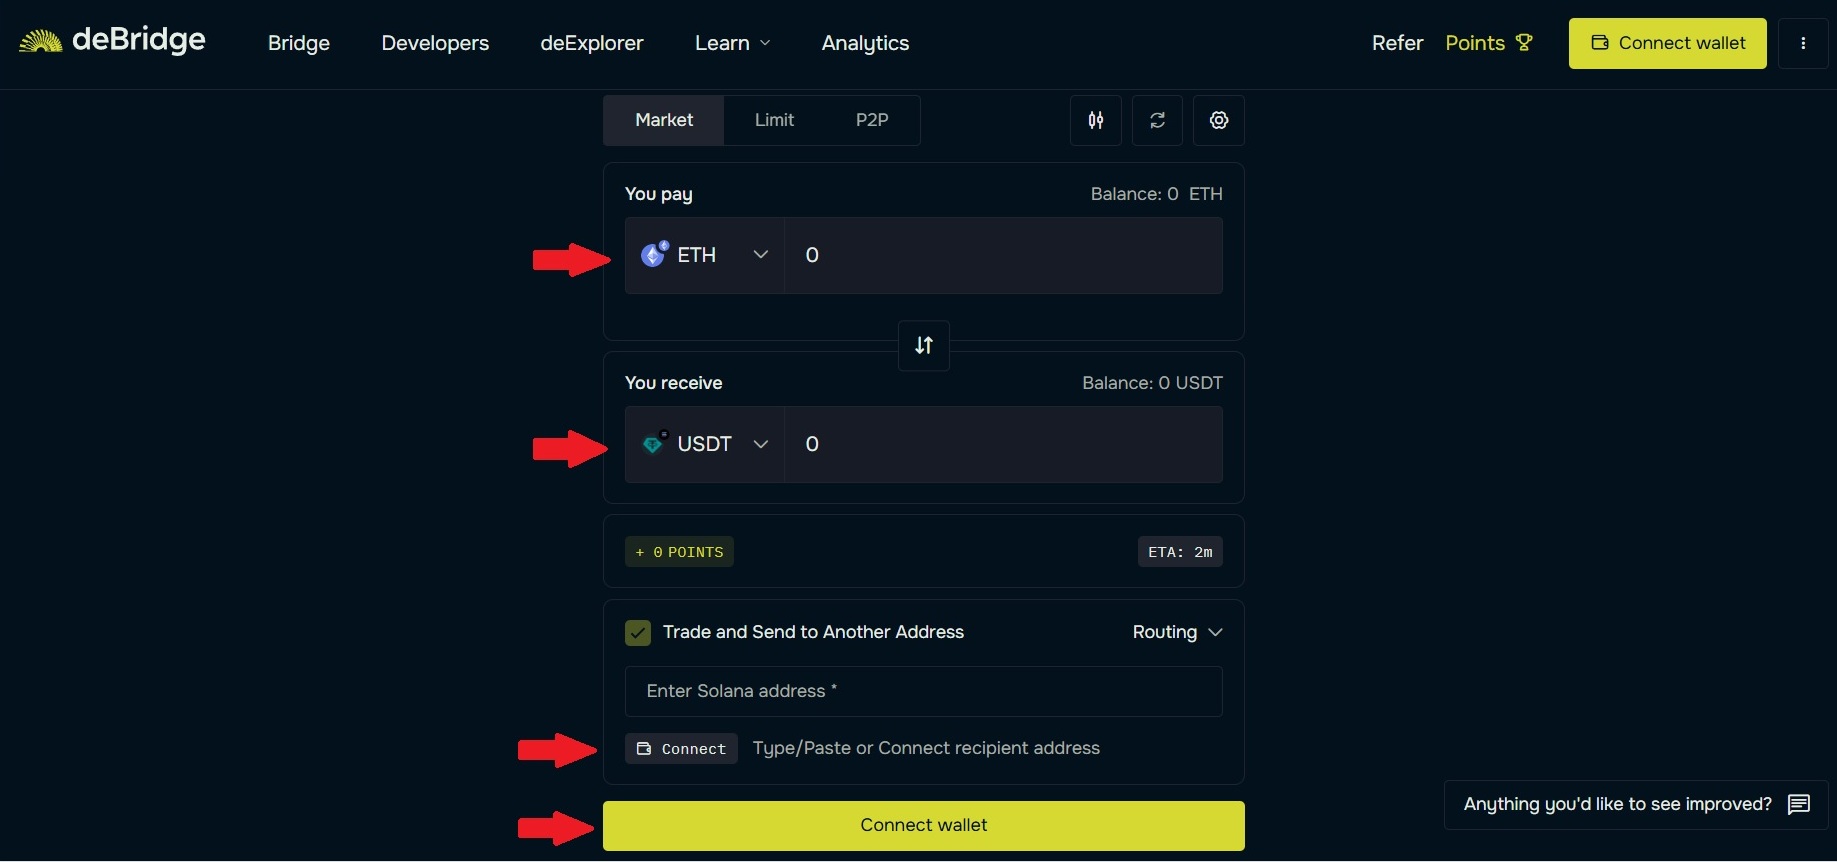
- Step 5: Enter the amount, then click Transfer.
- Step 6: Approve the transaction in MetaMask. deBridge will route your funds securely to Solana.
- Step 7: After confirmation, your tokens (or NFT) will appear in your Solana wallet.
For larger transfers or advanced features like limit orders, deBridge also lets you customize settings in the same dashboard.
Safety tips & best practices for bridging
Before you start bridging, keep these key safety tips in mind:
- Use only official links: Phishing sites are common. Always access bridges from the project’s main site or verified documentation.
- Start with a small test amount: Send $1–5 first to confirm the bridge works and your wallet is set up correctly.
- Keep your wallet secure: Use trusted wallets like Phantom or MetaMask. Don’t approve random contract interactions.
- Know the risks: Even top bridges have been exploited in the past. Wormhole was hacked in 2022, but has since improved security.
- Look for bridges with decentralized security: Tools like Axelar and deBridge use validator networks to verify transfers.
- Check for audit history or insurance options: Some bridges offer user protection or have been backed by funds to cover past exploits.
Bridging is safer than it used to be, but you should still be cautious. A few extra seconds of checking can save you from major losses.
The bottom line
In 2025, bridging to Solana has gotten pretty smooth.
Whatever you’re holding, and wherever you’re holding it, there’s a reliable way to bring your tokens into Solana’s fast and low-cost ecosystem.
And you have options:
- Allbridge for stablecoin transfers (and passive yield during transit)
- Axelar for advanced cross-chain functionality and Squid’s one-click swaps
- Wormhole for broad multi-chain support and deep integrations
- Jupiter for seamless auto-bridging via a swap interface
- Synapse for a hybrid approach of both liquidity pools and lock-and-mint method
- deBridge for high-security transfers and NFT capabilities
Together, these bridges are helping Solana connect with the entire multichain world.
Just remember the following:
- Stick to trusted bridges
- Follow best practices
- Always do your own research before you bridge
If you’re interested in better familiarizing yourself with the Solana ecosystem, check out our list of the best Solana DEX platforms.
Source:: 6 Best Solana Bridges in 2025: How to Transfer Tokens to the Solana Blockchain